3. Passing information to the second view
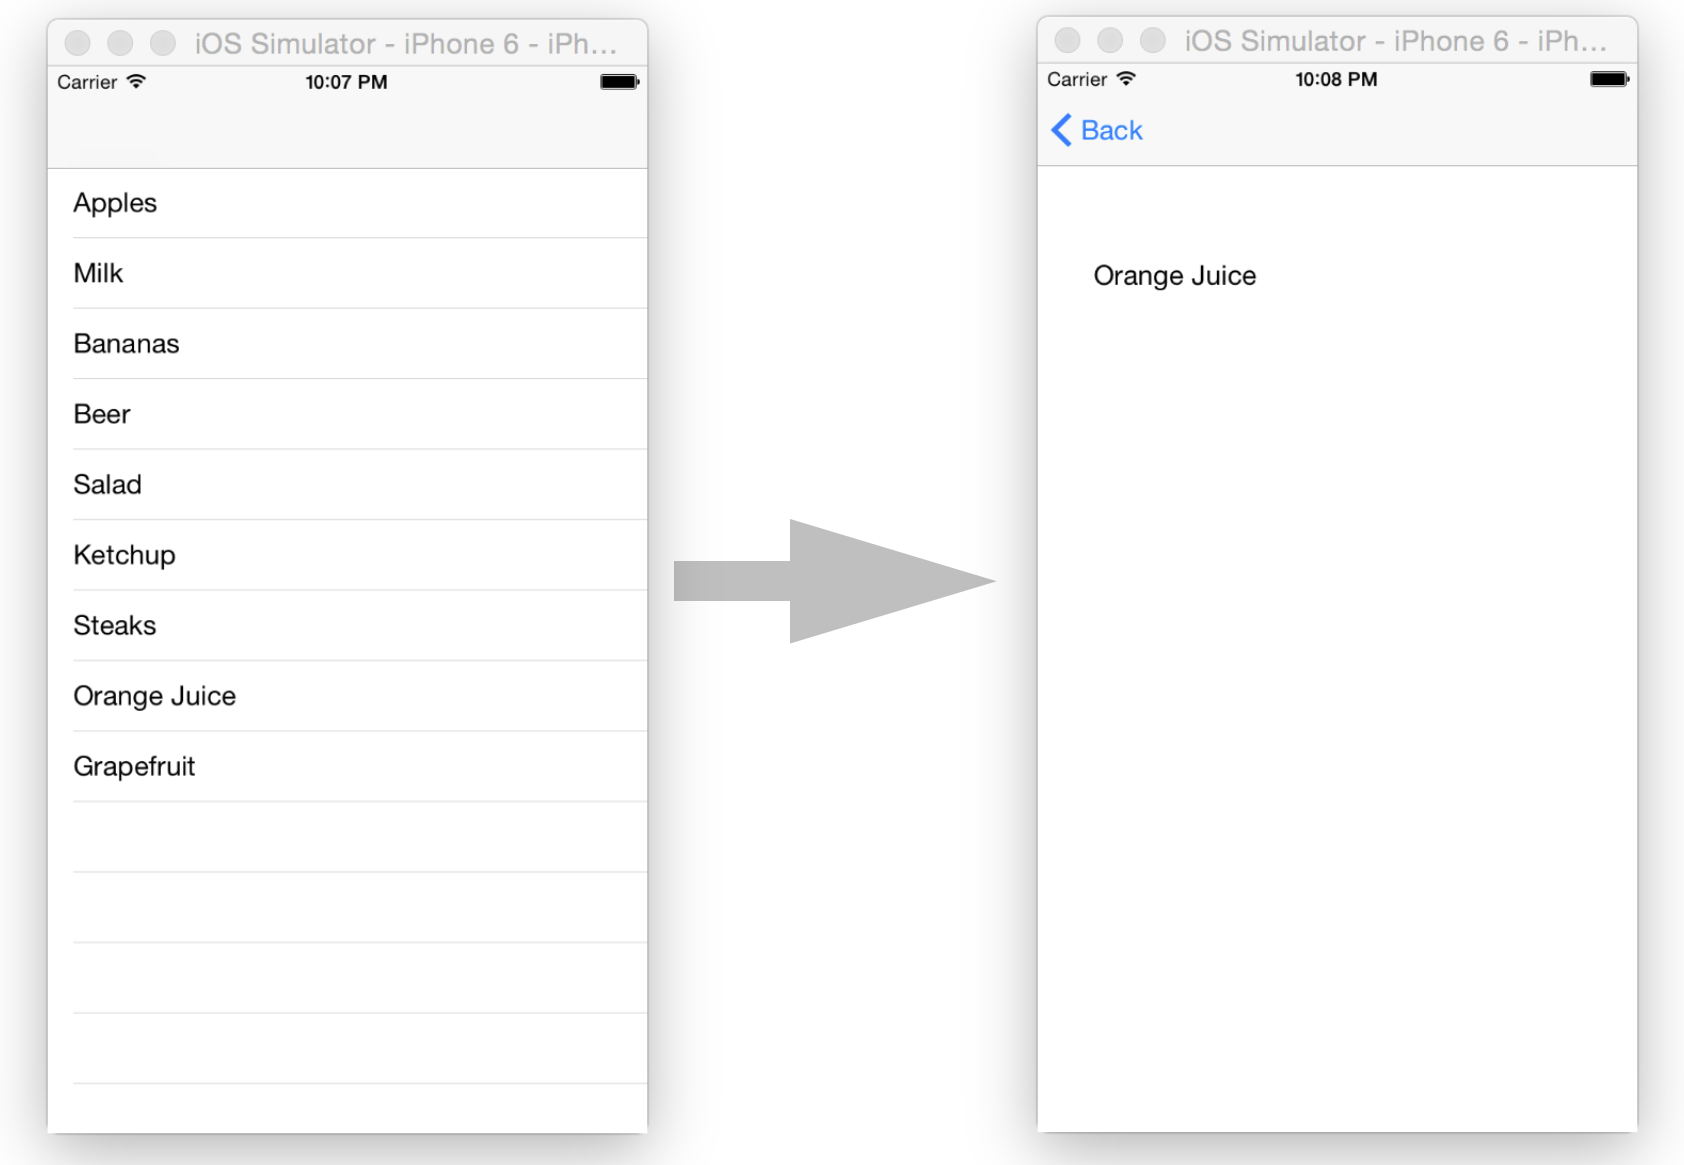
Extend your app so that the shopping item that has been selected in the TableView is shown in the Label of the second view.
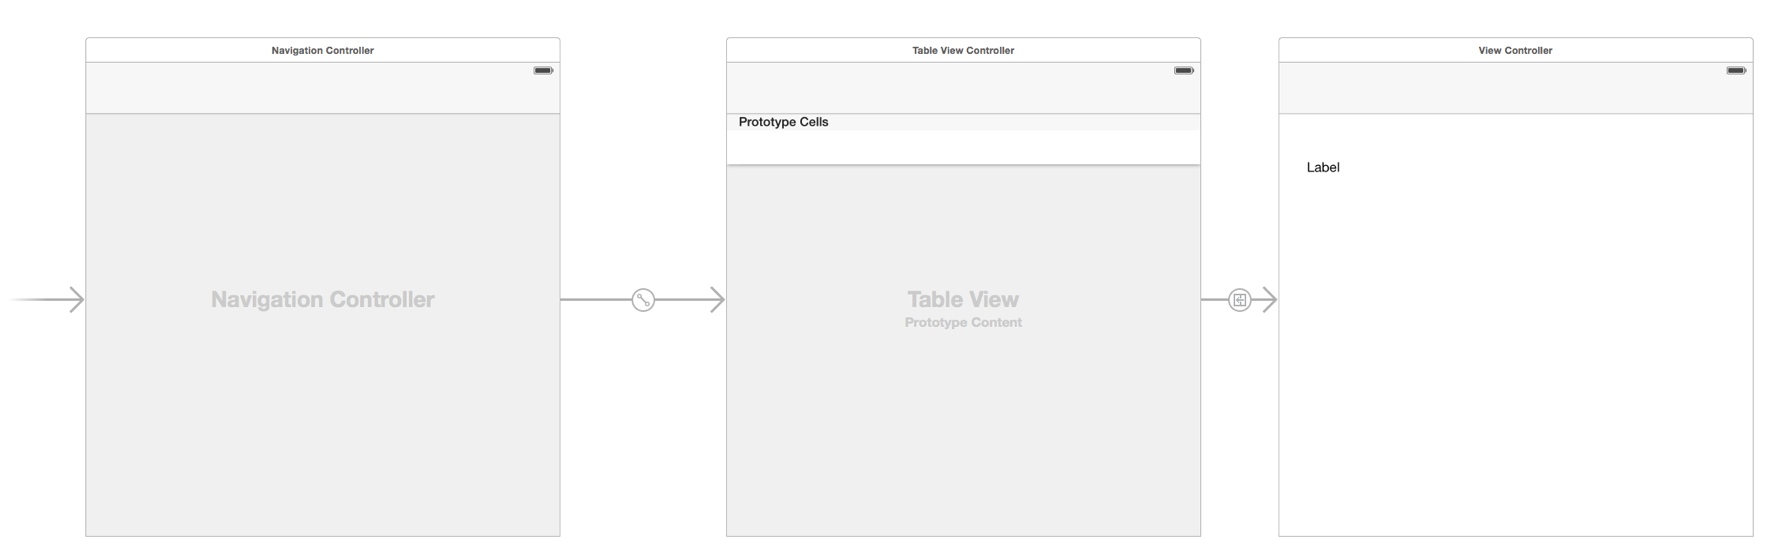
This requires to link the Label in the StoryBoard to the ViewController of the second view. When the view is loaded, the Label’s text should be set to the value of a new Property called „itemText: String“. Thus, please create this new Property in the ViewController class. Then in the viewDidLoad() method do the following to set the Label’s text:
override func viewDidLoad() {
    super.viewDidLoad()

    itemLabel.text = itemText

}
The Property „itemText“ should be set to the name of the selected item, just before the second view is shown. This is done using the prepareForSegue() method.
Please implement this method in your TableViewController class as shown below:
override func prepare(for segue: UIStoryboardSegue, sender: Any?) {

        let cell = sender as? UITableViewCell
        let detailView = segue.destination as? ViewController
        if (detailView != nil) {
            let index = tableView.indexPath(for: cell!)!
            detailView?.itemText = shoppingList[index.row]
        }

}
This method is called just before the segue transition is executed. The „segue“ object allows you to get access to the destination View Controller which in this case is the ViewController with the Label. By using the „indexPath(for: cell!)“ method you can find out which row was selected (the „sender“ is the selected TableViewCell).
Then you can pick the right item from your shopping list (the items Array in this case) and set the text that is subsequently set to the Label when the second view is loaded.
Unfortunately it is not possible to access the Label of the second view directly at this stage, as the Label is lazily initialized and when the view is not visible, it is nil.
Tip
Read the Apple documentation on StoryBoards to get more information
| Checklist |
|
| When tapping on a list item the second view is shown and the Label is set to the name of the item that was selected |
|