1/5

iOS Assignment

Introduction to Xcode and write first iOS app

Please conduct the following tasks alone. For implementation details you can refer to the lecture slides or the Apple developer website. Please do not hesitate to ask me or the tutor if you have any questions. Under “Tip” you can find some hints for the task. The “Checklist” specifies what should happen when your implementation is correct.

2/5

Tasks

  1. Create a new iOS Project in Xcode
  2. Connect your Button with an Action
  3. Debug your app
3/5

1. Create a new iOS Project in Xcode

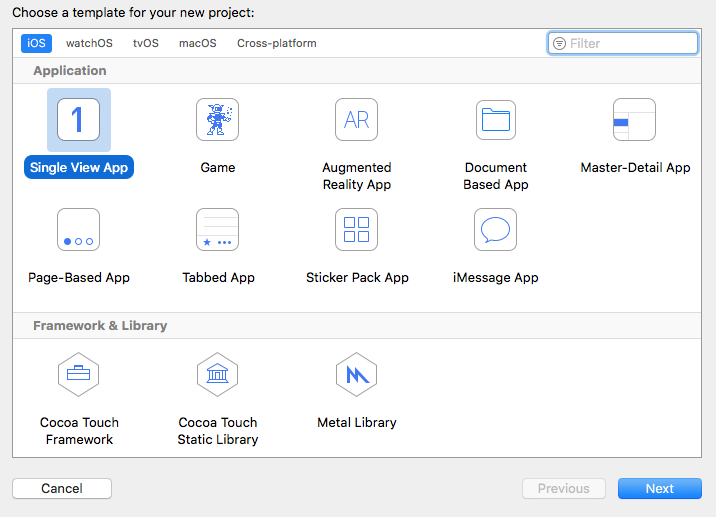
Start Xcode on MacOS and use the wizard to create a new iOS project. Choose the “Single View Application”-Template as a starting point.

center 50%

Tip

Follow the wizard instructions and fill in the following information:

center 50%

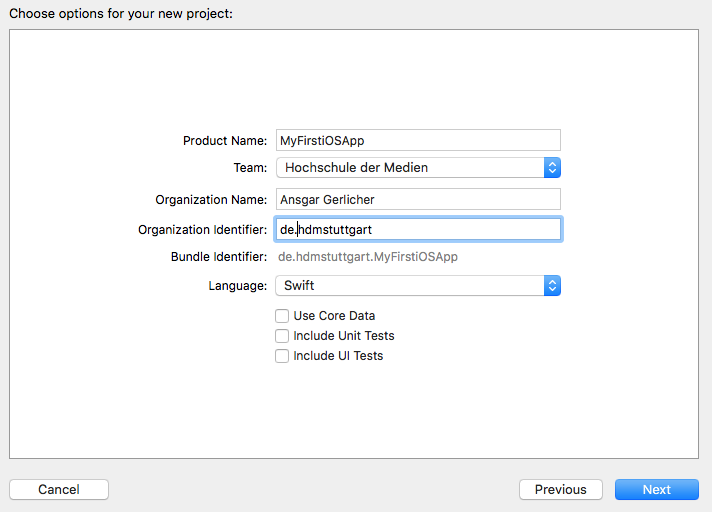
Product name: MyFirstiOSApp

This is also the Application Name appearing in the App list on the device later on.


Organization name: Your Name
Organization identifier: se.jonkoping

Type in the “Product Name” an “Organization name” and “identifier”. As programming language choose “Swift” and as Devices “iPhone”. Do not mark the checkbox “Use Core Data”. Save your project to the Desktop.

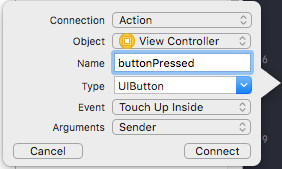
Next select the file “Main.storyboard” in the Navigator on the left and add a Label and Button via “drag and drop” to your View (see screenshot).

center 50%

That’s it. Now start your app in the Simulator by pressing the “Play”-Button in the top-left-corner.

Checklist
A new project is created and when launched you see your label and button in the Simulator.
4/5

2. Connect your Button with an Action

Select the “Main.storyboard”-File in the Navigator on the left side of the Xcode window. Then click on the “Show Assistant Editor”-Button to open the source-code of the corresponding ViewController next to the Story-Board editor. Then ctrl-right-click on the Button and drag the blue line to the source code (see screenshot).

center 50%

In the following dialog, select “Action” as “Connection”-type, give the method a name and press “Connect”.

center 30%

Do the same for the Label, but this time select “Outlet” as “Connection”-type. Now you have wired up both user-interface components with your source code. Next, implement the buttonPressed method, to change the text value of the Label. Create a counter variable that is incremented each time the button is pressed. Show the number in the Label’s text.

Tip

The UILabel class owns a property called text. You can set the text simply by assigning a new string (very similar to Java). You declare a variable by using the keyword “var”. To add the value of a variable to a String you can simply type \(varname) within the String.

Checklist
When you press the button, the label text should change correspondingly and show how many times you pressed the button.
5/5

3. Debug your app

Xcode has an integrated debugger. To demonstrate this, introduce a bug into your code. Add the following code to your ViewController source code somewhere in the “action”-method that is called when the button is pressed:

...
for index in (0 ..< 5).reversed() {
    print("index is \(index)")
    var d = 5/index
}
...

First start your app normally and see what happens. Then use the Debugger to debug the code by using breakpoints.

Tip

You don’t explicitly need to start the app in a debug mode. If you set a breakpoint above the buggy code, the debug-mode will automatically start, when you start the app.

Checklist
You have used to debugger to find and fix a bug in your application.