1. Create a new Android Project in Android Studio
Start Android Studio on MacOS, Linux or Windows and use the wizard to create a new Android project.
Tip
Follow the wizard instructions and fill in the following information:
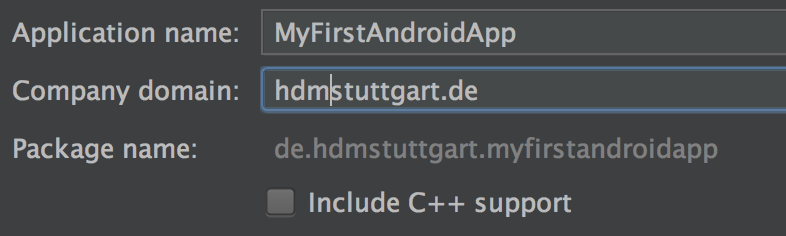
Application name: MyFirstAndroidApp
This is also the Application Name appearing in the App list on the device later on.
Company domain: hdmstuttgart.de
This will be used to generate the package namespace (following the same rules as for packages in the Java programming language) that you want all your source code to reside under. This also sets the package name under which the stub Activity will be generated. Your package name must be unique across all packages installed on the Android system; for this reason, it’s important to use a standard domain-style package for your applications. The example above uses the „de.hdmstuttgart” namespace ― when you develop your own applications, you should use a namespace that’s appropriate to your organization or entity. This is the reason why in the Android Studio Wizard you can only change the company domain and the package name is generated.
Do not check „Include C++ Support“, as this is not required for a standard Android application.
Select form factors
You can write Android apps for multiple targets. In this case we are only interested in Smartphone or Tablet targets. So check the box at „Phone and Tablet“ and leave the other boxes (Wear, TV, Android Auto) unchecked.
Minimum SDK
This value specifies the minimum API Level required by your application. It is a number referring to a version of the Android firmware the user needs to run your application. For example API 15 stands for Android 4.0.3 (IceCreamSandwich). If you choose the latest version your app will only run on devices with the latest version which usually are not too many. For this and the following assignments please select „API 22: Android 5.1 (Lollipop)“. The lastest might still have errors and since API 23 additional permission checks during runtime are required, wich complicates development.
Add an activity
For your first app choose the „Empty Activity“, as you do not need the features included with the other activity templates.
Activity Name: MainActivity
This is the name for the class stub that will be generated by the plugin. This will be a subclass of Android’s Activity class. An Activity is simply a class that can run and do work. It can create a UI if it chooses, but it doesn’t need to.
Layout Name
The layouts define the contents of your activity in XML. The menu is also defined in an XML file with the given name. In this case check the box „Generate Layout File“ and leave the „Layout Name“ activity_main. Layout names must be spelled in small letters without spaces.
Uncheck the box „Backwards Compatibility (AppCompat)“, as this is unnecessary for this assignment and only makes things more complicated. If you check this box, the class of your Activity will be derived from AppCompatActivity instead of Activity for backward compatibility reasons.
After clicking on “Finish” your app project will be generated.
2. Create an AVD
Use the Android Virtual Device (AVD) Manager in Android Studio to create a virtual Device with the latest available Android Version.
Tip
You can find the AVD Manager in the top toolbar in Android Studio.
The version available to you on the MacMinis should be API 23, Android 6.0 or higher. It is important that the virtual device has at least the same or higher version as the minimum API level you have set when creating the project (so e.g. 22). If this is not the case the app probably will not run on the virtual device.

3. Create an UI with a TextView and a Button
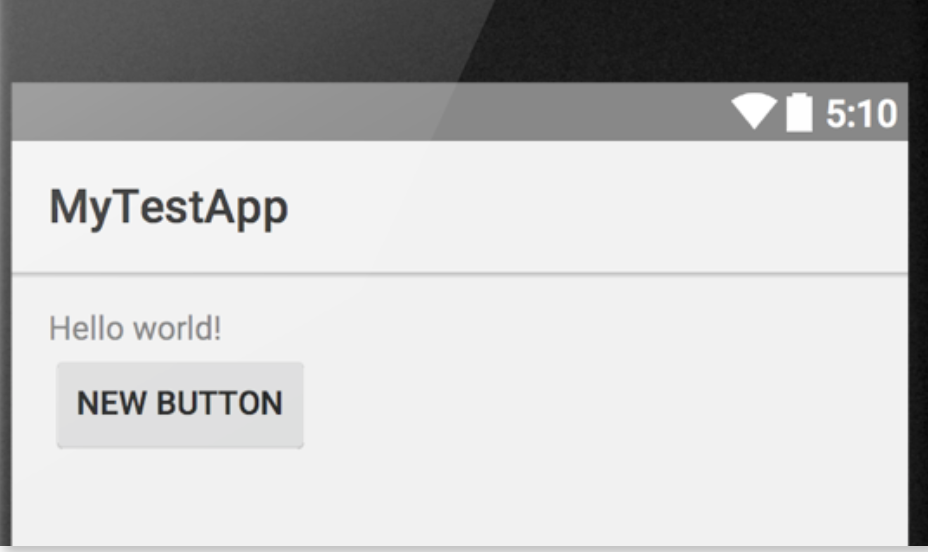
Edit your „activity_main“ layout file and create a layout containing a TextView and a button (similar to the one shown below). Add an „OnClickListener“ to the button and when the button is touched the text in the TextView should change to „Clicked X times“. Where X is the number of times the Button was touched.
Tip
Create a private counter variable. Use the method „findViewById“ to retrieve an instance of the TextView and Button classes defined in the layout.
| Checklist | |
|---|---|
| When the button is touched, the text changes correspondingly. |
4. Debug your app
Android Studio has an integrated debugger. To demonstrate this, introduce a bug into your code. Change your Activity source code to look like this:
...
@Override
public void onCreate(Bundle savedInstanceState) {
		super .onCreate(savedInstanceState);
		setContentView(R.layout.activity_main); Object o = null;
		o.toString();
	} ...
}
First start your app normally and see what happens. Then use the Debugger to debug the code by using breakpoints.
Tip
To start the app in debug mode, press on the little green „bug“ icon in the toolbar.
| Checklist | |
|---|---|
| You have used to debugger to find and fix a bug in your application. |